Buckling your child into their car seat is one of those everyday habits that can start to feel automatic. But a few small, easy-to-miss details can make the difference between a car seat that works the way it’s designed to and one that doesn’t. However, those mistakes are simple to fix once you know what to look for.
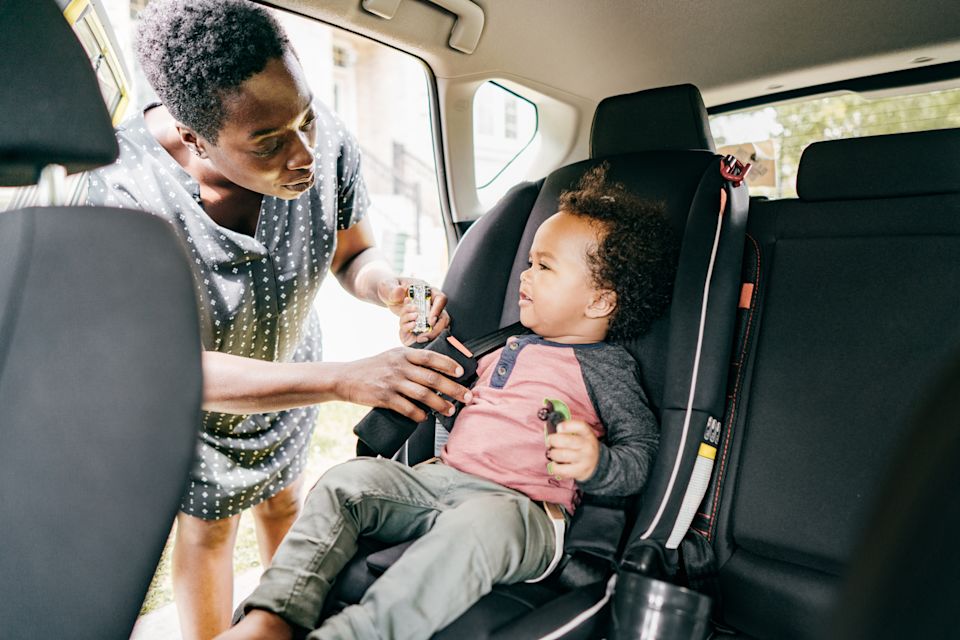
Car seats exist for a reason: They work. According to the National Highway Traffic Safety Administration (NHTSA), correctly installed seats can reduce the risk of fatal injury in a car crash by 71% for infants and 54% for toddlers. The challenge with car seats is that installing and using one correctly involves a lot of small steps, and it's easy to miss one. That’s more common than most parents realize.
Almost half of all car seats have at least one installation or use error, even though most parents and caregivers feel confident they’ve done it correctly. A closer look at real-world seat checks backs this up: More than two-thirds of car seats checked by certified technicians in 2024 had an error, and only about 1 in 5 parents seek expert help installing a seat.
However, the most common mistakes are also some of the easiest to fix. Here are four of them and how to catch each one.
It’s tempting to move your child to the next car seat stage when they reach a milestone, like a birthday. But car seat readiness is about size and safety limits, not age alone.
Rear-facing to forward-facing. In California, children under 2 years of age must ride in a rear-facing car seat unless the child weighs 40 or more pounds or is 40 or more inches tall. The American Academy of Pediatrics actually recommends going further than the legal minimum, keeping children rear-facing until they reach the maximum height or weight limit allowed by their specific car seat. Here’s something you may not know: Many modern convertible seats allow rear-facing well past age 2, often up to 40 to 50 pounds.
Rear-facing isn’t just a rule to follow. It’s there to ensure the safety of your child. In a crash, a rear-facing seat cradles your child’s whole body at once, much like a catcher’s mitt, spreading out the force of impact and protecting their head, neck, and spine. In a forward-facing seat, the harness holds your child’s body in place, but their head is still free to jerk forward toward their knees, putting far more strain on the neck. That difference is why keeping your child rear-facing for as long as your car seat’s limits allow is the safer choice.
Harness to booster, and booster to seat belt. The same pattern of moving stages too soon shows up at later transitions as well. Some children are moved to booster seats too soon, and most are moved to a regular seat belt too soon. Under California law, children under the age of 8 must be secured in a car seat or booster seat in the back seat, and children age 8 or at least 4 feet 9 inches tall may use a standard seat belt if it fits correctly. “Fits correctly” is the key phrase, and California's 5-Step Test is a simple way to check it. If your child can answer yes to all five, they're ready for a seat belt alone:
Can your child sit all the way back, with their whole back touching the seat?
Do their knees bend comfortably at the edge of the seat?
Does the shoulder belt cross between the neck and the arm, not on the neck?
Does the lap belt rest low, touching the tops of the thighs, not the belly?
Can they stay seated like this for the entire ride?
If the answer to any of these is no, your child still needs a booster seat.
The takeaway: Use your car seat’s height and weight limits, not your child’s age, as the final say for each transition, and lean toward keeping a child in a more protective stage a little longer rather than moving on a little early.
This is one of the most common car seat mistakes and one of the easiest to fix in seconds.
A harness that’s too loose, a chest clip in the wrong spot, or twisted harness straps can all give a child room to shift during a crash. That extra room reduces how well the seat can protect them.
Fixing the harness. After buckling your child in, do the pinch test. Pull the harness until it’s smooth and flat, then try to pinch any extra strap at your child’s shoulder. If you can pinch a fold of strap, it’s too loose and needs to be tightened. A snug harness is not uncomfortable for most children. If a child seems bothered, it’s usually because a strap is twisted or the clip is misplaced, not because the harness is too tight.
Fixing the chest clip. The chest clip should sit level with your child’s armpits and centered on the chest. A clip that sits too low, near the belly, can cause the harness straps to spread too wide during a crash and won’t hold them in the right position over the shoulders. One helpful rule of thumb: Tighten the harness first, then place the chest clip at armpit level. A tight clip can’t fix straps that are already too loose
It’s worth checking the harness and chest clip every single ride, not just once a month, since straps can loosen slightly with wiggling, twisting, or a child unbuckling and rebuckling themselves.
As a general rule, bulky clothing, including winter coats and snowsuits, should not be worn underneath the harness of a car seat. In a crash, fluffy padding immediately flattens out from the force, leaving extra space under the harness. That extra space can add up to four inches of slack, more than enough room for a child to slip free of the straps. This isn’t limited to big, puffy jackets, either: Even thinner puffer coats can affect how snugly a harness fits.
A simple way to check the car seat while your child is wearing any coat: Buckle your child in wearing the coat and tighten the harness until it passes the pinch test. Then, without loosening the harness, remove the coat and try the pinch test again. If you can now pinch extra strap, that coat is too bulky to wear under the harness.
To keep a child warm without compromising the harness:
Have your child wear a thin fleece or sweatshirt under the harness instead of a bulky coat.
Drape a blanket or the child’s coat over the harness straps after buckling them in rather than putting it on underneath.
For toddlers and older children, some parents put the coat on backward, over the buckled harness, so the arms stay warm without adding bulk underneath the straps.
Warm up the car ahead of time, and be sure to leave your child’s face uncovered if using a blanket to avoid trapped air.
The same rule applies at any age in a harnessed seat, whether your child is 2 or 6. A puffy coat squishes down the same way no matter how big your child has grown.
A car seat that was installed correctly six months ago may not still be correctly installed today. Kids grow, straps loosen with regular use, and switching vehicles or car seats introduces a new chance for something to be off.
To test your current installation: Grab the seat at the belt path (the strap of the seatbelt or LATCH connector that runs through the car seat to hold it in place) and try to move it side to side and front to back. More than one inch of movement in any direction means it’s too loose, and the seat belt or LATCH straps need to be tightened and rechecked.
Forgetting to attach the top tether is another common and easily overlooked mistake. Every forward-facing seat has a built-in tether strap, but it only works if it’s actually clipped to your vehicle’s tether anchor, usually located on the back of the seat, the rear shelf, or the ceiling, depending on your car. If it isn’t attached, the top of the seat can tip forward much farther than it should in a sudden stop.
A few moments when it’s worth double-checking your installation:
After a growth spurt. Most car seats have several slots where the harness straps can be threaded, so you can raise the straps as your child grows taller. Rear-facing harness straps must sit at or below the shoulders, while forward-facing straps must sit at or above the shoulders. Using the wrong slot puts crash force on the wrong part of a child’s body.
After switching vehicles. Convertible car seats often have two separate belt paths, one for rear-facing and one for forward-facing, and they can’t be used in place of each other. Check your seat’s manual any time your child’s seating position or vehicle changes.
After any car accident. Most manufacturers recommend replacing a car seat after a moderate or severe crash, and some recommend replacement after any crash at all, so check your specific seat’s manual for guidance.
On a regular schedule. Regular checks matter, especially after long trips or switching vehicles, since normal use can gradually loosen even a properly installed seat over time.
You don’t have to catch every detail on your own. Free professional installation checks are available from certified Child Passenger Safety Technicians at CHP offices, fire stations, and children’s hospitals across California. To find one near you, use the NHTSA's car seat inspection station locator, or contact your nearest CHP Area Office directly to ask about scheduling a check.
A technician will check installation, belt path, recline angle, harness fit, chest clip position, and tether use. Even parents who feel confident might end up having at least one thing to correct. This is a great free resource to catch the small details that can be easy to miss on your own.
Car seats work best when the small details are right: the correct stage for your child’s size, a snug harness with the clip at armpit level, no bulky coat under the straps, and a fresh check after growth spurts or vehicle changes. None of these take more than a few minutes to fix, and a quick check today can make a real difference in how well the seat protects your child on the road.